GlassFish 7 in Eclipse IDE
Eclipse IDE provides 2 plugins for GlassFish Server
- OmniFish tools for Eclipse GlassFish – works with GlassFish 7, 6, 5 and 4. Works with GlassFish 7.1 with a configuration tweak until a new version of the plugin supports it out of the box. This plugin is actively maintained by OmniFish. it’s based on the older GlassFish Tools plugin and it works very similarly to it.
- GlassFish Tools plugin – works with GlassFish 5, 4, and 3.1. Doesn’t work with GlassFish 7. It’s not actively maintained anymore.
Workaround for GlassFish 7.1 and newer
The current version of the OmniFish Tools plugin requires an additional configuration adjustment to make it work with GlassFish 7.1 or newer. This is because newer versions of GlassFish cleaned up the boostrap configuration, moving some internal classes to a different location, where the Eclipse IDE plugin cannot find them.
To fix this and help the plugin to find the required classes, you can do as follows:
- If you already configured a server, open Server configuration in Eclipse IDE (double click on the item in the Servers view). You will also need to do this for an new Server configuration
- Open launch configuration
- In the Arguments tab, specify the following VM arguments:
--module-path
/path/to/glassfish/glassfish7/glassfish/lib/bootstrap
--add-modules
ALL-MODULE-PATH
where /path/to/glassfish is path to the GlassFish installation.
After this modification, Eclipse IDE will be able to work with the configured GlassFish server as usual.
How to install the OmniFish Tools plugin
To configure the GlassFish server in Eclipse IDE, it’s best to install the Eclipse IDE for Enterprise Java and Web Developers. This Eclipse IDE package already contains additional tools to bootstrap the Java EE/Jakarta EE application. The OmniFish Tools plugin extends this functionality to allow you to run your applications on GlassFish from the Eclipse IDE.
To install this plugin, you can simply drag this  button and drop it into Eclipse IDE Workspace, and then press the Confirm button. Then follow with the Step 3 below to complete the installation.
If you have trouble using the Install button, start from the Step 1 to install the plugin manually.
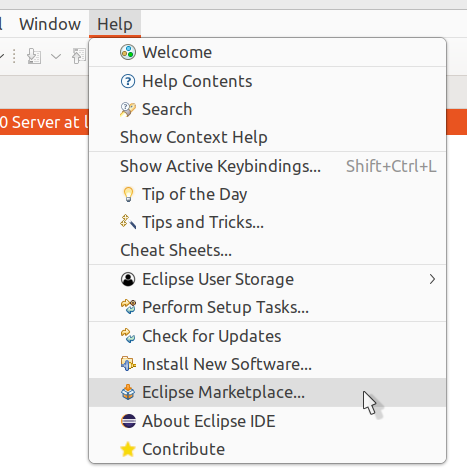
Step 1. Inside Eclipse IDE, select Help -> Eclipse marketplace…
Step 2. Select the OmniFish tools for Eclipse GlassFish plugin
Or you can search for OmniFish – type OmniFish into the “Find:” field and press Enter:

Step 3. Press Finish on the next screen.
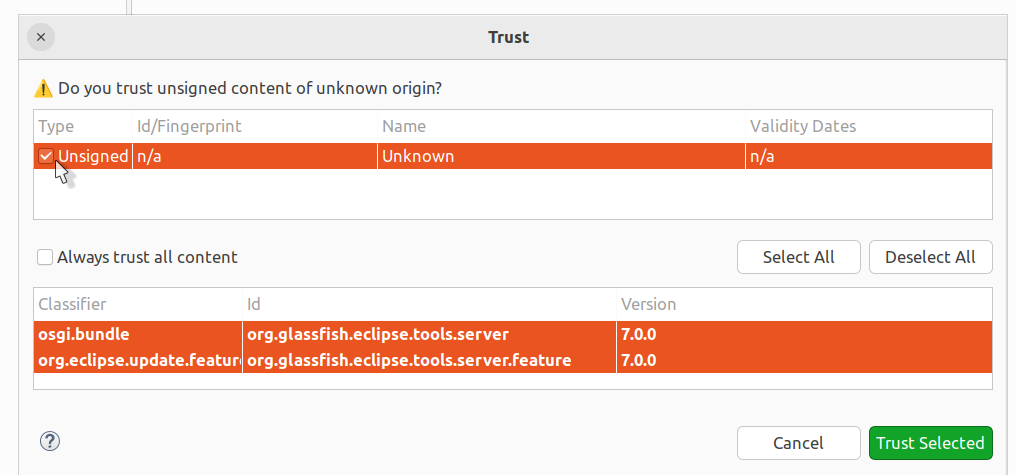
Step 4: Click the checkbox next to Unsigned and press Trust Selected.
This step is necessary until the OmniFish Tools plugin in the Eclipse Marketplace is signed by OmniFish.
Step 5: Restart Eclipse IDE after the installation is finished.
How to add GlassFish Server to Eclipse IDE
After the OmniFish Tools plugin is installed and Eclipse IDE restarted, we can add GlassFish Server to Eclipse IDE.
Step 1: Click on the Windows option in the menu bar. Then click on the Show View option. Finally, choose the Servers option.
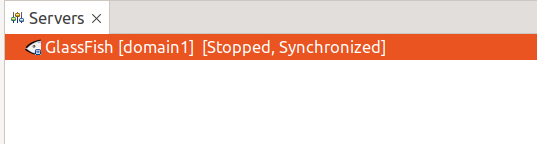
Eclipse IDE should open a window called Servers:

Step 2: Create a new server to add GlassFish Server.
If you haven’t created any server yet, you can click the link “No servers are available. Click this link to create a new server…”. Or you can right click into the Servers window, select New, and then Server. Both options will open the New Server dialog:
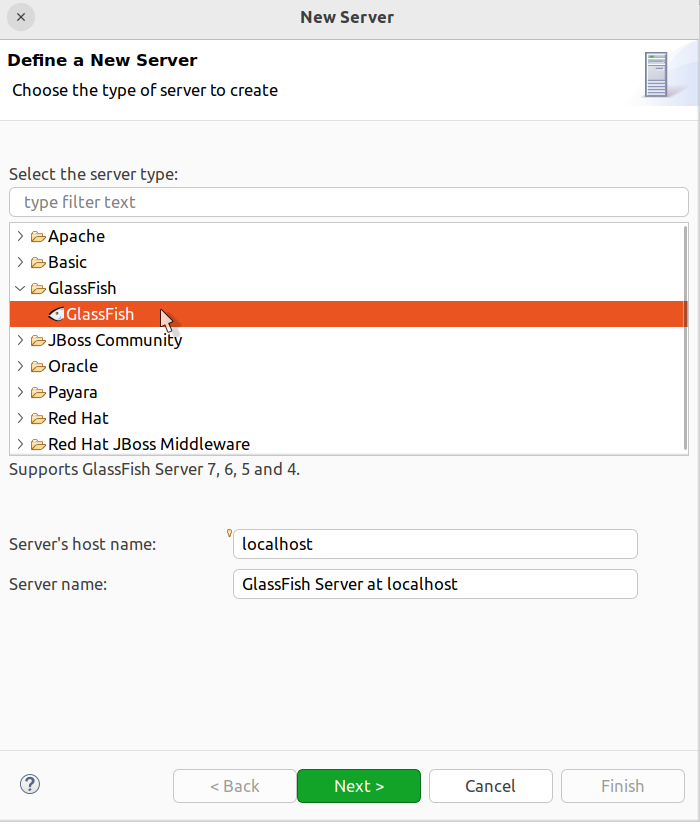
Find GlassFish in the list of server types and select it. You can change the Server name to anything you like (e.g. My GlassFish).
Step 3: Press Next. This will open the GlassFish runtime configuration dialog:
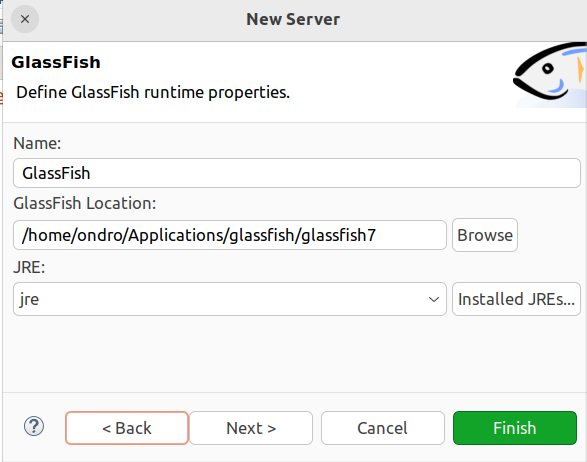
In the GlassFish Location field, specify the path to the GlassFish Server installation directory.
You can also change the name of the GlassFish runtime, e.g. to GlassFish 7. The GlassFish runtime specifies the location of the GlassFish Server installation, while the GlassFish Server configuration in Eclipse IDE specifies how the runtime will be started (which GlassFish domain is used, debug port number, etc.) and which applications will be deployed to it. Multiple server configurations in Eclipse IDE can share the same GlassFish runtime (GlassFish installation).
Step 4: Define properties for the integration of GlassFish Server into the Eclipse IDE.
To use the default properties, you can press Finish. To change the default properties or review them, press Next:
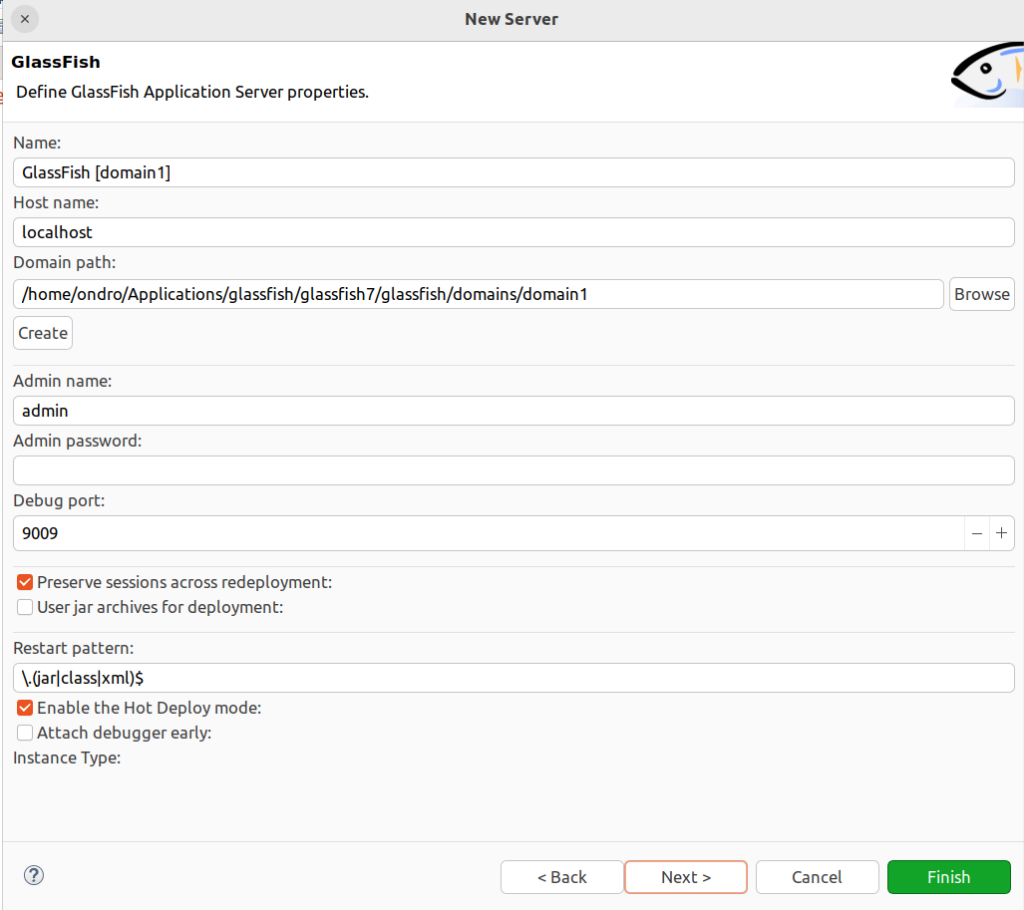
When done, press Finish.
Step 5: GlassFish Server is now fully configured and ready to be used from Eclipse IDE. it can be accessed from the Servers view: