Good bye, Jakarta Staging, OSSRH and Nexus Staging Maven Plugin! Are you scared? Don’t be afraid, we have some good news, your deployment is not in danger, rather the opposite.
Table of Contents
Why Sonatype Made That?
The usage and load gradually increases and increases also the pressure from users to ensure safety of distributed artifacts. The original system allowed nearly anything to be deployed including highly controversial software. There were several Nexus systems which allowed authorized users to stage artifacts and then make them public after some evaluation. The system was old, slow and protected just by username and password. Simply said, it was obsoleted.
Scared of Changes
Honestly, I always hated the nexus-staging-plugin due to its complexity and its deviation from the standard Maven lifecycle. Once we configured it, everyone was afraid to touch it while it was doing its job. We simply executed some how-to sequence or pressed few buttons to run preconfigured CI jobs.
Well, now the better part of this post.
What Changed
- OSS Nexus repositories are dead. Good bye, Jakarta Staging, OSSRH, etc!
- Well, not so exactly, but they are not used for pushing releases to Maven Central anymore, except legacy access.
- The new website: https://central.sonatype.com
- The nexus-staging-plugin is dead.
- A new official plugin was created: https://central.sonatype.org/publish/publish-portal-maven/
- Sonatype JIRA is dead.
- You can send emails to [email protected] and you will get a response via email
- Surprisingly it works quite well, the Sonatype team responds pretty quickly.
- New namespaces allocated by deployers
- You have to prove that you own such domain name or some alternative (io.github.username ie.).
- Many existing users and their projects were migrated automatically, many not.
- The most important thing: your POM files have to change.
- Not just because of the new deployment process
- There are new requirements for the project, see https://central.sonatype.org/publish/requirements/
- Things are finally easy if you follow the rules.
… And It Is Done
So, what we had to do?
Create Maven Central Account
Sounds easy, right? Be careful, the way you will use to log into the Maven Central portal is extremely important. If you would use your GitHub account, Maven Central then takes your primary e-mail as your login and ignores any other bound to your GitHub account.
Write an e-mail
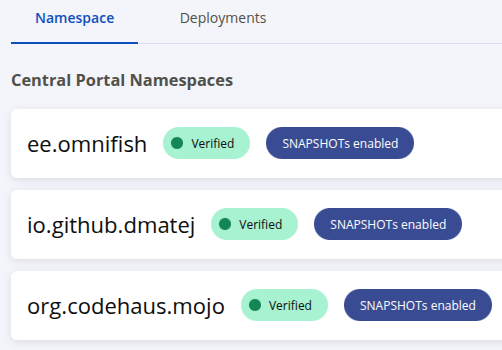
Obviously, if you found all your namespaces already in the list, you can skip this part. In my case I did not see any of them, so I kindly asked Sonatype for an assistance, described my issues so after some correspondence:
- ee.omnifish – Our team already distributed some artifacts using OSSRH, but just one of us had an account that was allowed to publish them. So we asked to add give permissions for this namespace to more persons, including myself.
- org.mojohaus – My original OSSRH account was migrated to the new infrastructure and I succeeded to log in. As I already started using the GitHub account, I asked Sonatype support to merge it into the new account that is connected to my GitHub account.
POM changes
As we needed to deploy Arquillian GlassFish Container project artifacts under our company’s namespace, we had to do a bit more, because we could not pass Maven Central’s validations. So we
- renamed all groupIds from
org.omnifacestoee.omnifishas it is defined by the namespace. - renamed all java packages from
org.omnifacestoee.omnifishas it was requested by Maven Central validation. - removed all
nexus-staging-maven-pluginreferences as it is impossible to use anymore. - added
central-publishing-maven-pluginto send the deployment to Maven Central (instead of the nexus-staging plugin). - added
maven-release-plugin– in my experience good projects use this plugin for releases, bad projects do magic. Now we are the good ones.
You can see the final result in updated pom.xml – let’s extract two important parts, I added some comments for you. The release profile then enables these settings:
<plugin>
    <!-- Used for the release process, so the plugin changes numbers,
    executes the final tests iteration, tags the result,
    changes version to next snapshot, pushes changes to github -->
    <artifactId>maven-release-plugin</artifactId>
    <version>3.1.1</version>
    <configuration>
        <lineSeparator>lf</lineSeparator>
        <autoResolveSnapshots>true</autoResolveSnapshots>
        <autoVersionSubmodules>true</autoVersionSubmodules>
        <pushChanges>false</pushChanges>
        <tagNameFormat>@{project.version}</tagNameFormat>
    </configuration>
</plugin>
<plugin>
    <!-- Used for usual deployment to any Maven repository you wish,
    your local Artifactory or Nexus, another of your company, etc -->
    <artifactId>maven-deploy-plugin</artifactId>
    <version>3.1.4</version>
    <configuration>
        <deployAtEnd>true</deployAtEnd>
    </configuration>
</plugin>
<plugin>
    <!-- Used for deployment to Maven Central - note that it doesn't
    make your deployment publicly available, you have to visit the website
    and click the button -->
    <groupId>org.sonatype.central</groupId>
    <artifactId>central-publishing-maven-plugin</artifactId>
    <version>0.8.0</version>
    <extensions>true</extensions>
    <configuration>
        <!-- Good name to avoid confusion - by default it uses the name Deployment.
        Bad idea: ${project.name} - ${project.version} will use the last name
        in the reactor build. -->
        <deploymentName>My project name ${project.version}</deploymentName>
        <!-- This is a selector of credentials saved in your
        <server> item in settings.xml -->
        <publishingServerId>central</publishingServerId>
    </configuration>
</plugin><profile>
<id>release</id>
<build>
<plugins>
<!-- Signing with GPG is a requirement for a release deployment to Maven central. -->
<plugin>
<artifactId>maven-gpg-plugin</artifactId>
<version>3.2.8</version>
<executions>
<execution>
<id>sign-artifacts</id>
<phase>verify</phase>
<goals>
<goal>sign</goal>
</goals>
</execution>
</executions>
</plugin>
<plugin>
<groupId>org.sonatype.central</groupId>
<artifactId>central-publishing-maven-plugin</artifactId>
</plugin>
</plugins>
</build>
</profile>
GitHub Profile Changes
You can’t publish unsigned jar files anymore. You have to add the gpg-maven-plugin to your build – if it s not already there. To make it work, in needs a GPG key, so you have to generate some using your favorite tool. See https://docs.github.com/en/authentication/managing-commit-signature-verification/generating-a-new-gpg-key for more. Don’t forget three things:
- To register the new key on GitHub or on any other publicly well known and respected key authority.
- To set the
gpg.keynameproperty in yoursettings.xml. - To execute the signing after all artifacts have been prepared (javadoc, sources, etc)
The settings.xml Changes
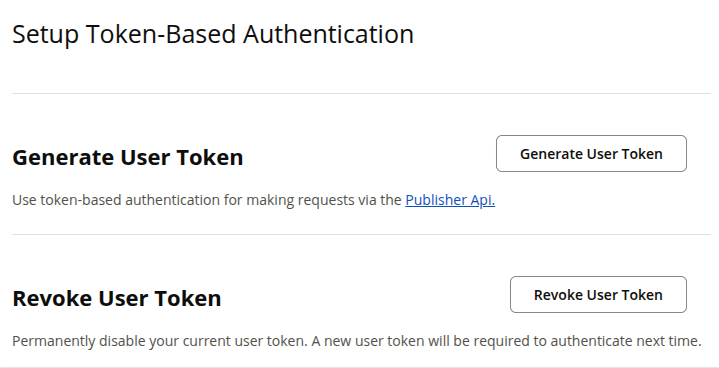
The new deployment uses tokens generated on Maven Central website. Visit your profile and this web page will generate a snippet for you which you can add to settings.xml for Maven to use for authentication. You can revoke the token after the release again, so nobody else can hack you. Just a small warning – the page will hide the popup after a while and you will never see the token again – but don’t worry, just create another one.
<profile>
    <id>omnifish</id>
    <properties>
        <!-- We have to sign all artifacts, so we need -->
        <gpg.keyname>...</gpg.keyname>
        <gpg.passphraseServerId>omnifish-signature</gpg.passphraseServerId>
    </properties>
</profile>
...
<server>
    <id>central</id><!-- Matches the publishingServerId element -->
    <!-- Generated by the Generated User Token button -->
    <username>...</username>
    <password>...</password>
    <configuration>
        <!-- milliseconds, it is useful sometimes -->
        <timeout>100</timeout>
    </configuration>
</server>
<server>
    <id>omnifish-signature</id>
    <passphrase>...</passphrase>
</server>
Well, I also have my private Nexus repository which I use as a cache and sometimes to run some integration tests when we do breaking changes. We do care about other projects to have an easy upgrade. So I can do some private pre-release and then test everything together. Finally, I can drop everything at any point for any reason without a need to ask anyone.
<profile>
    <id>dmatej-nexus</id>
    <properties>
        <altDeploymentRepository>dmatej-releases::http://localhost:8888/repository/maven-releases</altDeploymentRepository>
        <altSnapshotDeploymentRepository>dmatej-snapshots::http://localhost:8888/repository/maven-snapshots</altSnapshotDeploymentRepository>
        <deploy.skip>false</deploy.skip>
    </properties>
    <repositories>
        <repository>
            <id>dmatej-snapshots</id>
            <name>dmatej-snapshots</name>
            <url>http://localhost:8888/repository/cache</url>
            <releases>
                <enabled>false</enabled>
            </releases>
            <snapshots>
                <enabled>true</enabled>
            </snapshots>
        </repository>
        <repository>
            <id>dmatej-releases</id>
            <name>dmatej-releases</name>
            <url>http://localhost:8888/repository/cache</url>
            <releases>
                <enabled>true</enabled>
            </releases>
            <snapshots>
                <enabled>false</enabled>
            </snapshots>
        </repository>
    </repositories>
</profile>
...
<server>
    <id>dmatej-snapshots</id>
    <username>...</username>
    <password>...</password>
</server>
<server>
    <id>dmatej-releases</id>
    <username>...</username>
    <password>...</password>
</server>
Local Deployment
Time to deploy something locally. This is a really easy thing supported by the default maven lifecycle.
mvn clean deploy -Pdmatej-nexusRelease – Experimental Phase
You push to the Maven Central side, but not to the public Maven Central Repository yet. Then after a quick automated validation you can finally press the Publish button – or you can drop the deployment.
If you drop the deployment, you have to restore the state before the changes. One option is to revert a few commits. Another option is to reset HEAD back to the original state – that might not be permitted on all repositories or branches. A very good idea is then to make the release in a branch, which can be dropped as a whole, and only when everything succeeded, you will merge it to the main branch after the deployment to Maven Central was made public. Note that how the Maven Release Plugin manages the release and rollbacks depends on its configuration.
When you hit the Publish button, from that moment the deployment is managed by Maven Central and you can see it, but you can’t work with it any more. Don’t forget to recheck everything is pushed, tagged, you uploaded your artifacts whenever you need, etc.
git checkout -b release-2.0.0 omnifish/main # create local release branch
git push omnifish release-2.0.0 # push it to GitHub

# Use Maven Release Plugin to do the release on your side.
mvn release:prepare -Pomnifish,release -DpushChanges=false -DdevelopmentVersion=2.0.1-SNAPSHOT -DreleaseVersion=2.0.0 -Dtag=2.0.0
git push omnifish 2.0.0 # :perform would fail without that.

# This will create a ZIP file and deploy it to the Maven Central.
# Still doesn't make it publicly available, it will wait
# first for an automated validation, then for your approval.
mvn release:perform -Pomnifish,release -DpushChanges=false

# ... experiments ... mess ... something broke ... somebody doesn't like it ...
git push omnifish :2.0.0 # Delete the remote tag
git tag -d 2.0.0 # Delete the local tag
# First check where you stand!
# Then reset to the state before the release started, or where you need to.
git reset --hard HEAD^^

# Alternative.
# Commits and pushes backup files. Usually you don't want that,
# but if the deletions is forbidden, you have no other choice.
# You still should execute it - at least it will remove those backup files.
mvn release:rollback -Pomnifish,release

# Done. Nowe we can start experimenting again! Release
Well, this is quite nice now, after all. A few commands, then any testing you needed, deployment, and finally hit the Publish button. Then just wait for a notification that your deployment became publicly available to the world via Maven Central.
# If you did not create the branch already
git checkout -b release-2.0.0 omnifish/main
git push omnifish release-2.0.0

# Changes the version, builds, tags, changes the version to the next snapshot
mvn release:prepare -Pomnifish,release,skipTests -DpushChanges=false -DdevelopmentVersion=2.0.1-SNAPSHOT -DreleaseVersion=2.0.0 -Dtag=2.0.0

# Push the tag - release:perform needs it.
git push omnifish 2.0.0

# Checks the tag out, and does the deploy to the Maven Central
mvn release:perform -Pomnifish,release,skipTests -DpushChanges=falseNow you can open the Maven Central website and check your deployments: https://central.sonatype.com/publishing/deployments
The Maven Central portal will validate your deployment. The rules will probably change over time. If your deployment did not pass, you will quickly find out why: https://central.sonatype.org/publish/requirements/ – if you set the plugin to wait for the validation and the validation fails, it does not tell you much – the deployment web page does. This will probably improve in future versions.
Well, okay, now you can hit the Publish button, finally. Next time it will be much faster, now you probably had to beat some debt from the past. Good job! Just the last thing – finish changes in sources.
git push omnifish release-2.0.0Then create the pull request to the main branch, so your changes will merge and you can continue with the next iteration of development of a new version of your project.
You should also close the milestone on GitHub and prepare the Release Notes for the version if you did not do that already. Then don’t forget to tell the world that you succeeded too!
